Generating envelopes always begins with a search for contacts in your database. It can be initiated from the Contact—Individual Search, Mentor Search, Donor—Organization Search, etc.
Note: The Mailings functionality requires Microsoft Word 2007 or a newer version.
-
Go to the Search screen for the type of contact you would like to generate envelopes for.
-
Enter the appropriate search criteria (e.g. potential mentors).
-
Click Run Search.
-
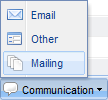
In the first tab of search results, click on the Communication button and select Mailing.
-
You will be taken to the Mailing screen. On the right hand side, you will see information regarding the search you just performed.

-
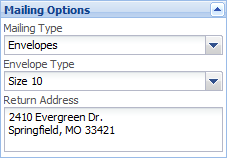
In the Mailing Options area, set the Mailing Type to Envelopes, select the appropriate Envelope Type and enter your return address (if you want it printed on the envelopes).
-
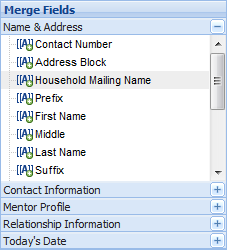
Insert the fields from your data that you would like printed on the envelope by double-clicking them in the Merge Fields area on the right hand side—they will insert into your template wherever your cursor is.
-
Here is an example of a completed envelope template:
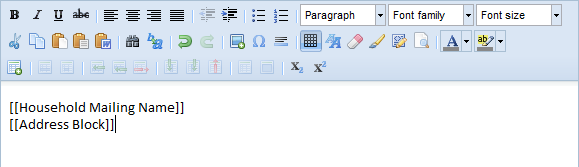
Note: To insert a line break without a blank line in-between, hold the Shift key when pressing Enter on your keyboard. -
Click the Run Merge button at the bottom of the screen.

-
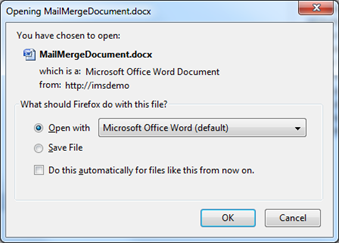
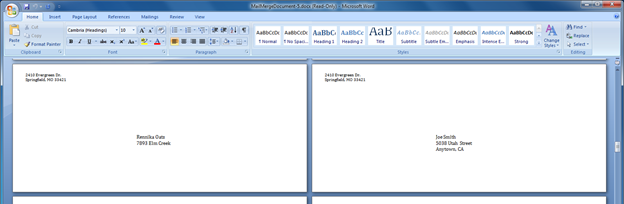
The database will generate a single Word document with all of the envelopes in it—one per search result.
-
Select the Open with… option and click OK. The merged document will open in Word.
-
Review the document and make any manual adjustments you would like. Be sure to insert the correct sized envelopes in the printer before printing.
-
(Optional) You may save the envelope template you have just created for future use.
a. Click the Save Template button at the bottom of the screen.
![]()
b. Complete the form in the New Template window and click the Save button.
For additional information, please see our training video: Using Mailings and Labels