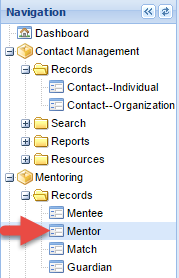
1.In your left-hand side navigation, click on Mentor.
2.Click the New Mentor button at the top of the screen.

3.Select Create a New Contact, then enter the first and last name of the mentor.
Optional: The system can perform duplicate record checking if you choose to enter more information about the Mentor.
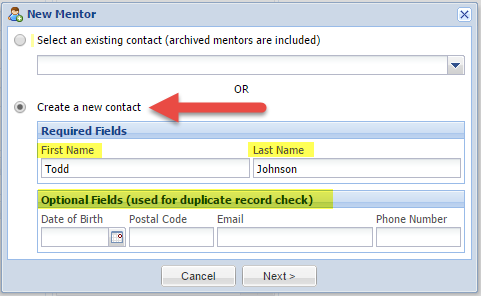
4.Click Next
5.Select MYL Group Mentoring or MYL One on One Mentoring.
_Note: If a mentor is involved in more than one program, you can add the additional program involvement after the mentor’s record is set up.
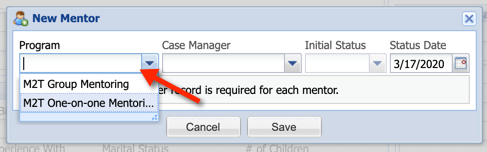
6.Select a Case Manager
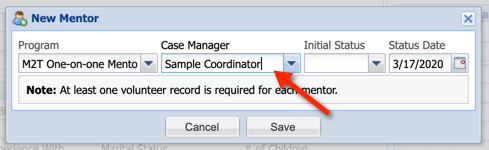
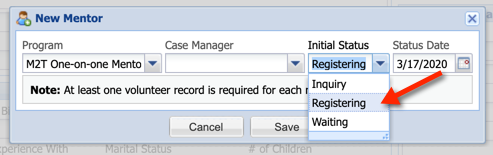
7.Select Initial Status for the mentor as Registering.
Please note that a mentor must have a status of Waiting before he or she can be matched in the software. But, for data entry purposes you must choose an initial status of Registering.
8.Select the appropriate Status Date from the calendar by clicking on the calendar icon. Or type in the appropriate status date in the format of 1/1/2023.
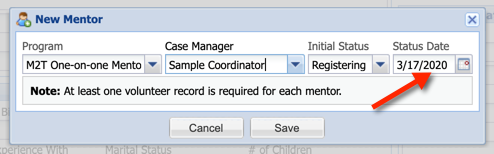
9.Click Save and you will be taken to the mentor record screen for this mentor.
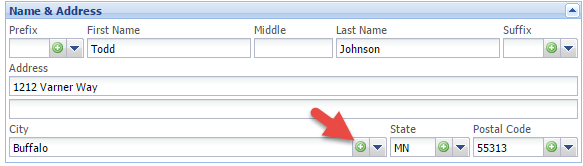
10.Enter the Mentor Address.
Please note that seeing this icon ![]() next to a field anywhere in the database indicates that the field is a list where you can add additional options to the existing drop down list. By clicking the green circle, you are able to add another choice to the drop down list for the field. You will need to do this each time you add a new city, state or postal code.
next to a field anywhere in the database indicates that the field is a list where you can add additional options to the existing drop down list. By clicking the green circle, you are able to add another choice to the drop down list for the field. You will need to do this each time you add a new city, state or postal code.
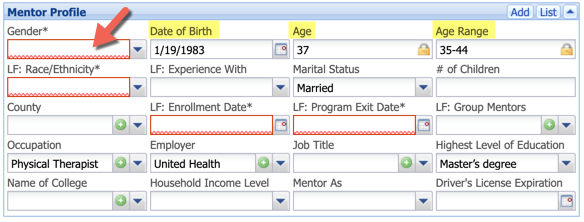
11.Complete the Mentor Profile Fields.
The profile fields outlined in red are required. These fields contain information required for the grant.
Please note: Once you have completed the Date of Birth field, an Age and an Age Range automatically generate.
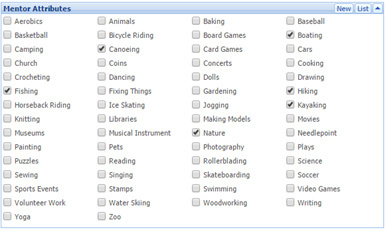
12.Select Mentor Attributes. You may select as many as needed.
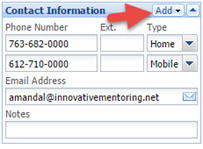
13.Complete Mentor Contact Information. Please note you are able to add additional phone numbers, email addresses, etc. by clicking the Add button.
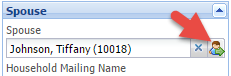
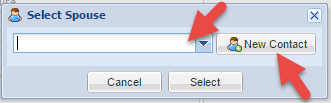
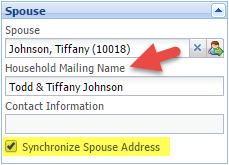
14.Complete the Spouse information for the mentor, if applicable.
• Click on the little blue person icon at the end of the Spouse field. ![]()
• Either choose a spouse from the drop down list (could already in the system as a cont
act) or click the New Contact button, complete the first and last name fields, and click save, then select.
• Indicate whether you would like to Synchronize the mentor and spouse addresses. Please note that a Household Mailing Name was generated. You can modify this field if you would like it to appear differently.
Spouses have their own contact records in the database where additional information about the spouse (including contact information) can be added. You can find the contact record by either clicking the little person icon or from the Contact Individual screen under the Contact Management Module on the navigation bar.