Agencies participating in the OJJDP Mentoring Youth for Leadership (MYL) grant are responsible for keeping their own documentation files (hard copies or electronic copies) for each mentor, including the following:
- Statement of Suitability (additionally, this requirement will be tracked as a registration step within the mentor record and must be completed for all mentors participating in the grant, including those who were screened prior to the grant award)
- FBI/State fingerprint screening (If FBI fingerprint screening is not available, the LLF program can use State Bureau of Investigation screening if available. However, state screening must be completed for each state that the mentor lived in, worked in, and/or went to school in within the last 5 years.)
- Child abuse registry checks for each state that the mentor lived in, worked in, and/or went to school in within the last 5 years (If child abuse registry checks are not available in a state, the LLF program must provide documentation—a letter from the agency or a screen shot from the agency website—stating that that is the case.)
- Dru Sjodin National Sex Offender Public Website
- Other screening requirements that the site has for their program
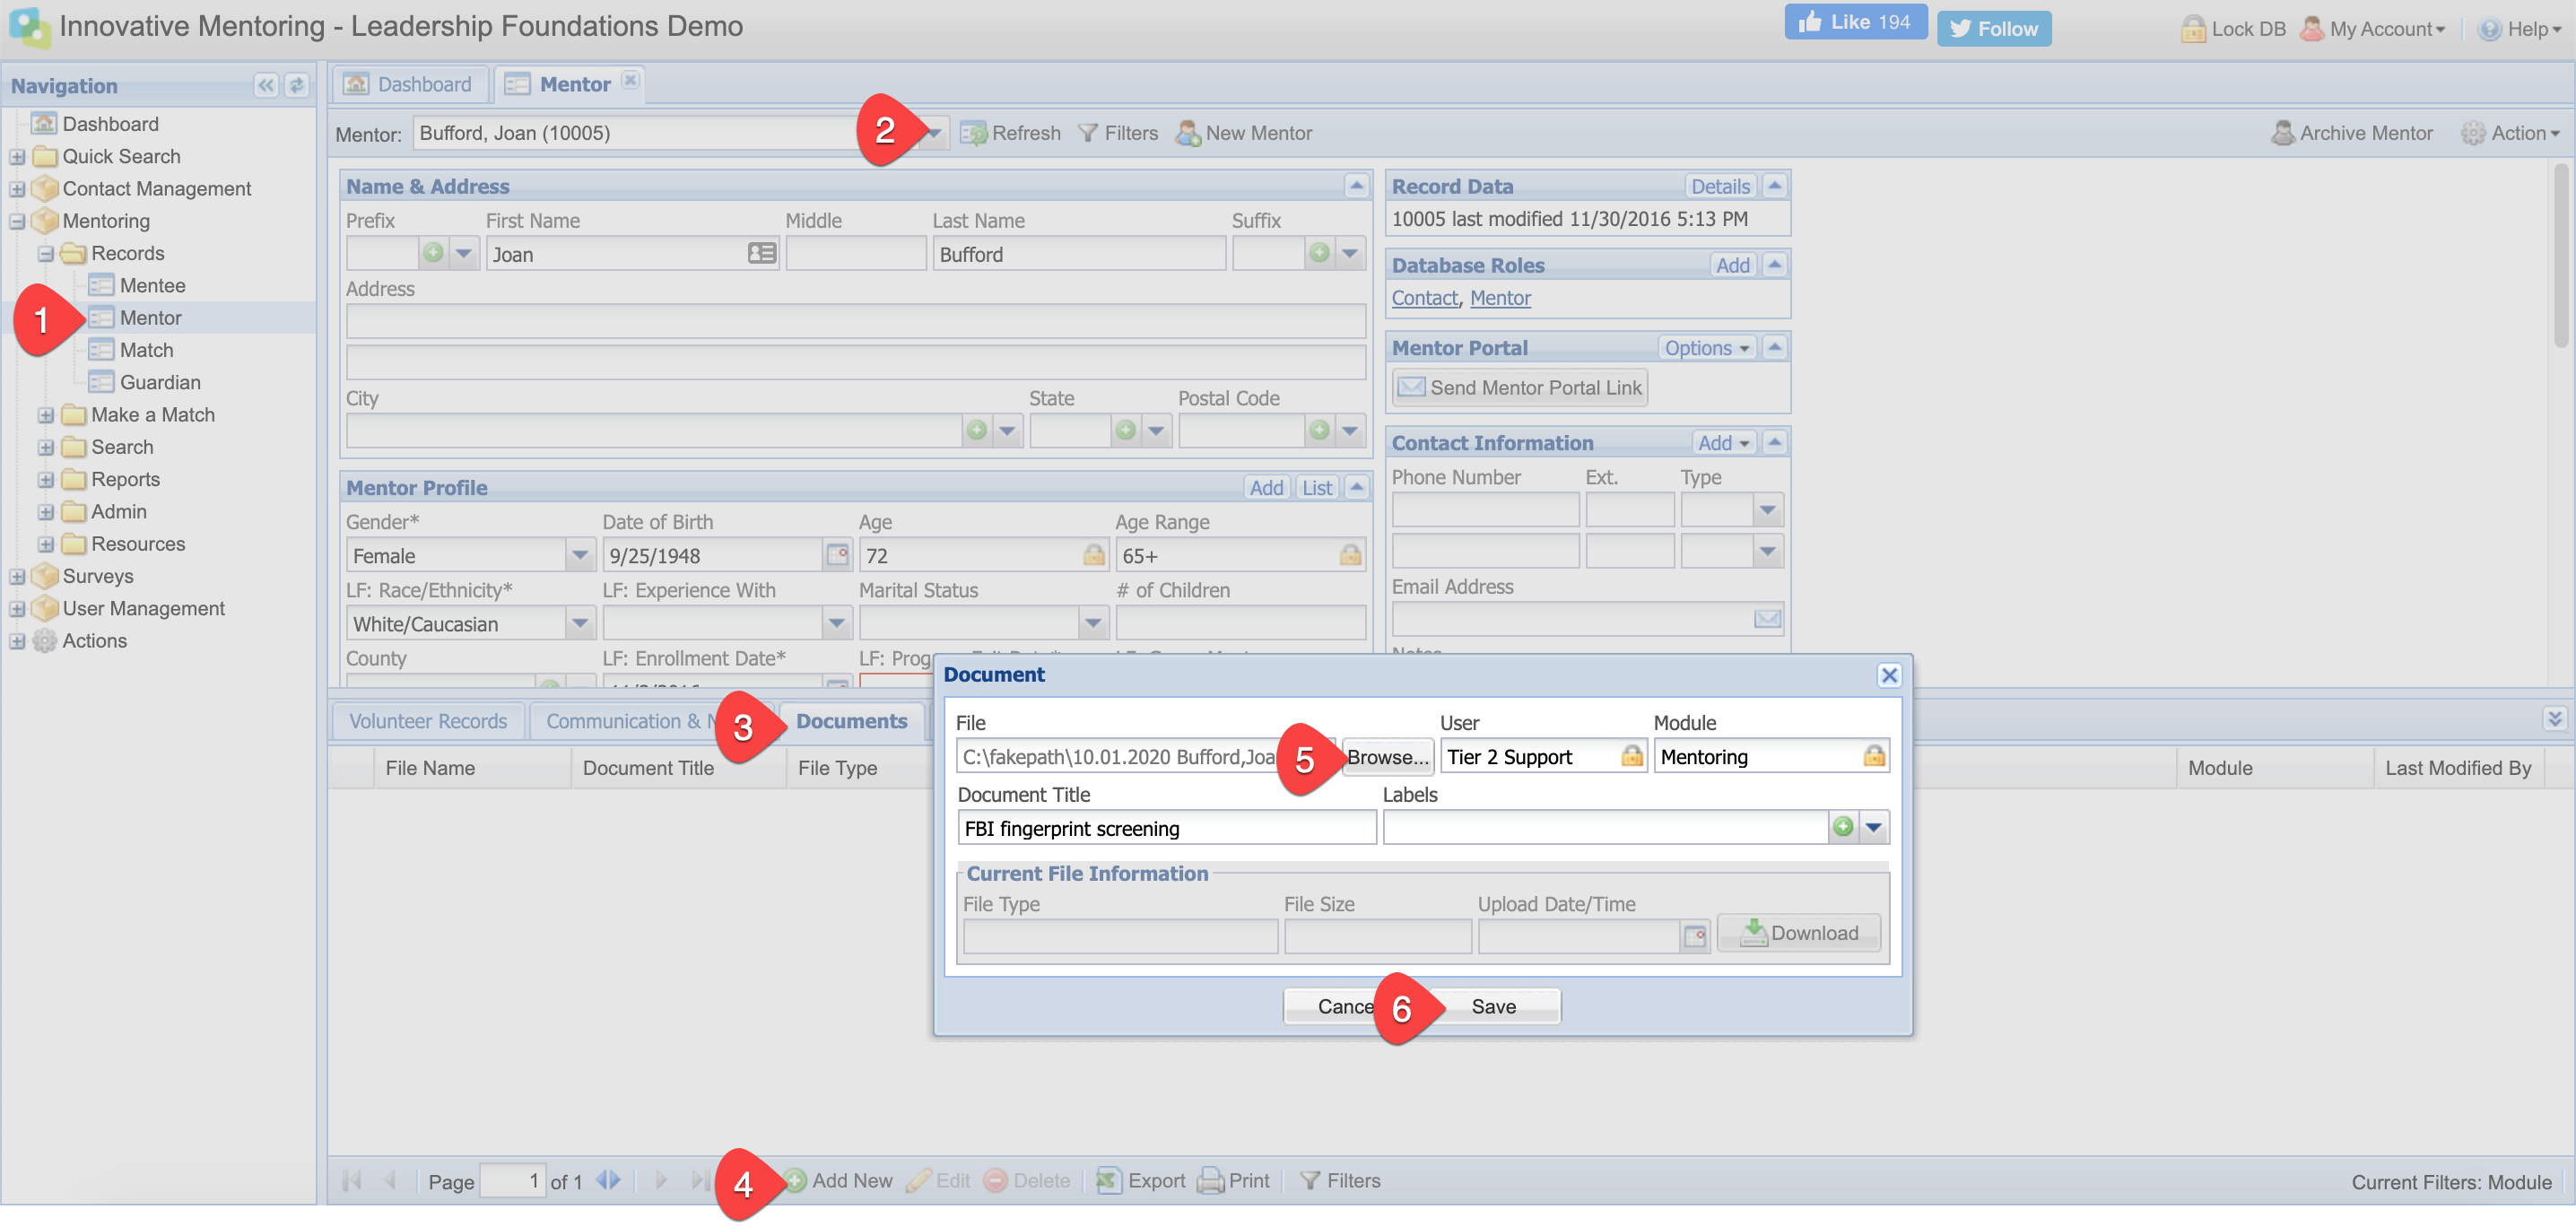
To upload electronic copies of the above-listed files/documentation to your IMS database, use the following steps after scanning the file and saving it to a location that you can access from your device (eg - to a local folder (Documents) or to a network folder):
- Navigate to the Mentor folder.
- Select the mentor whose file you will be uploading from the Lookup.
- Select the Documents tab.
- Select the Add New footer button.
- Click the Browse button and select the desired file. Note that the Browse function will allow you to find files that are saved to your computer or network drive.
- Click Save.
Repeat steps 1-6 for each document you will be storing in IMS.
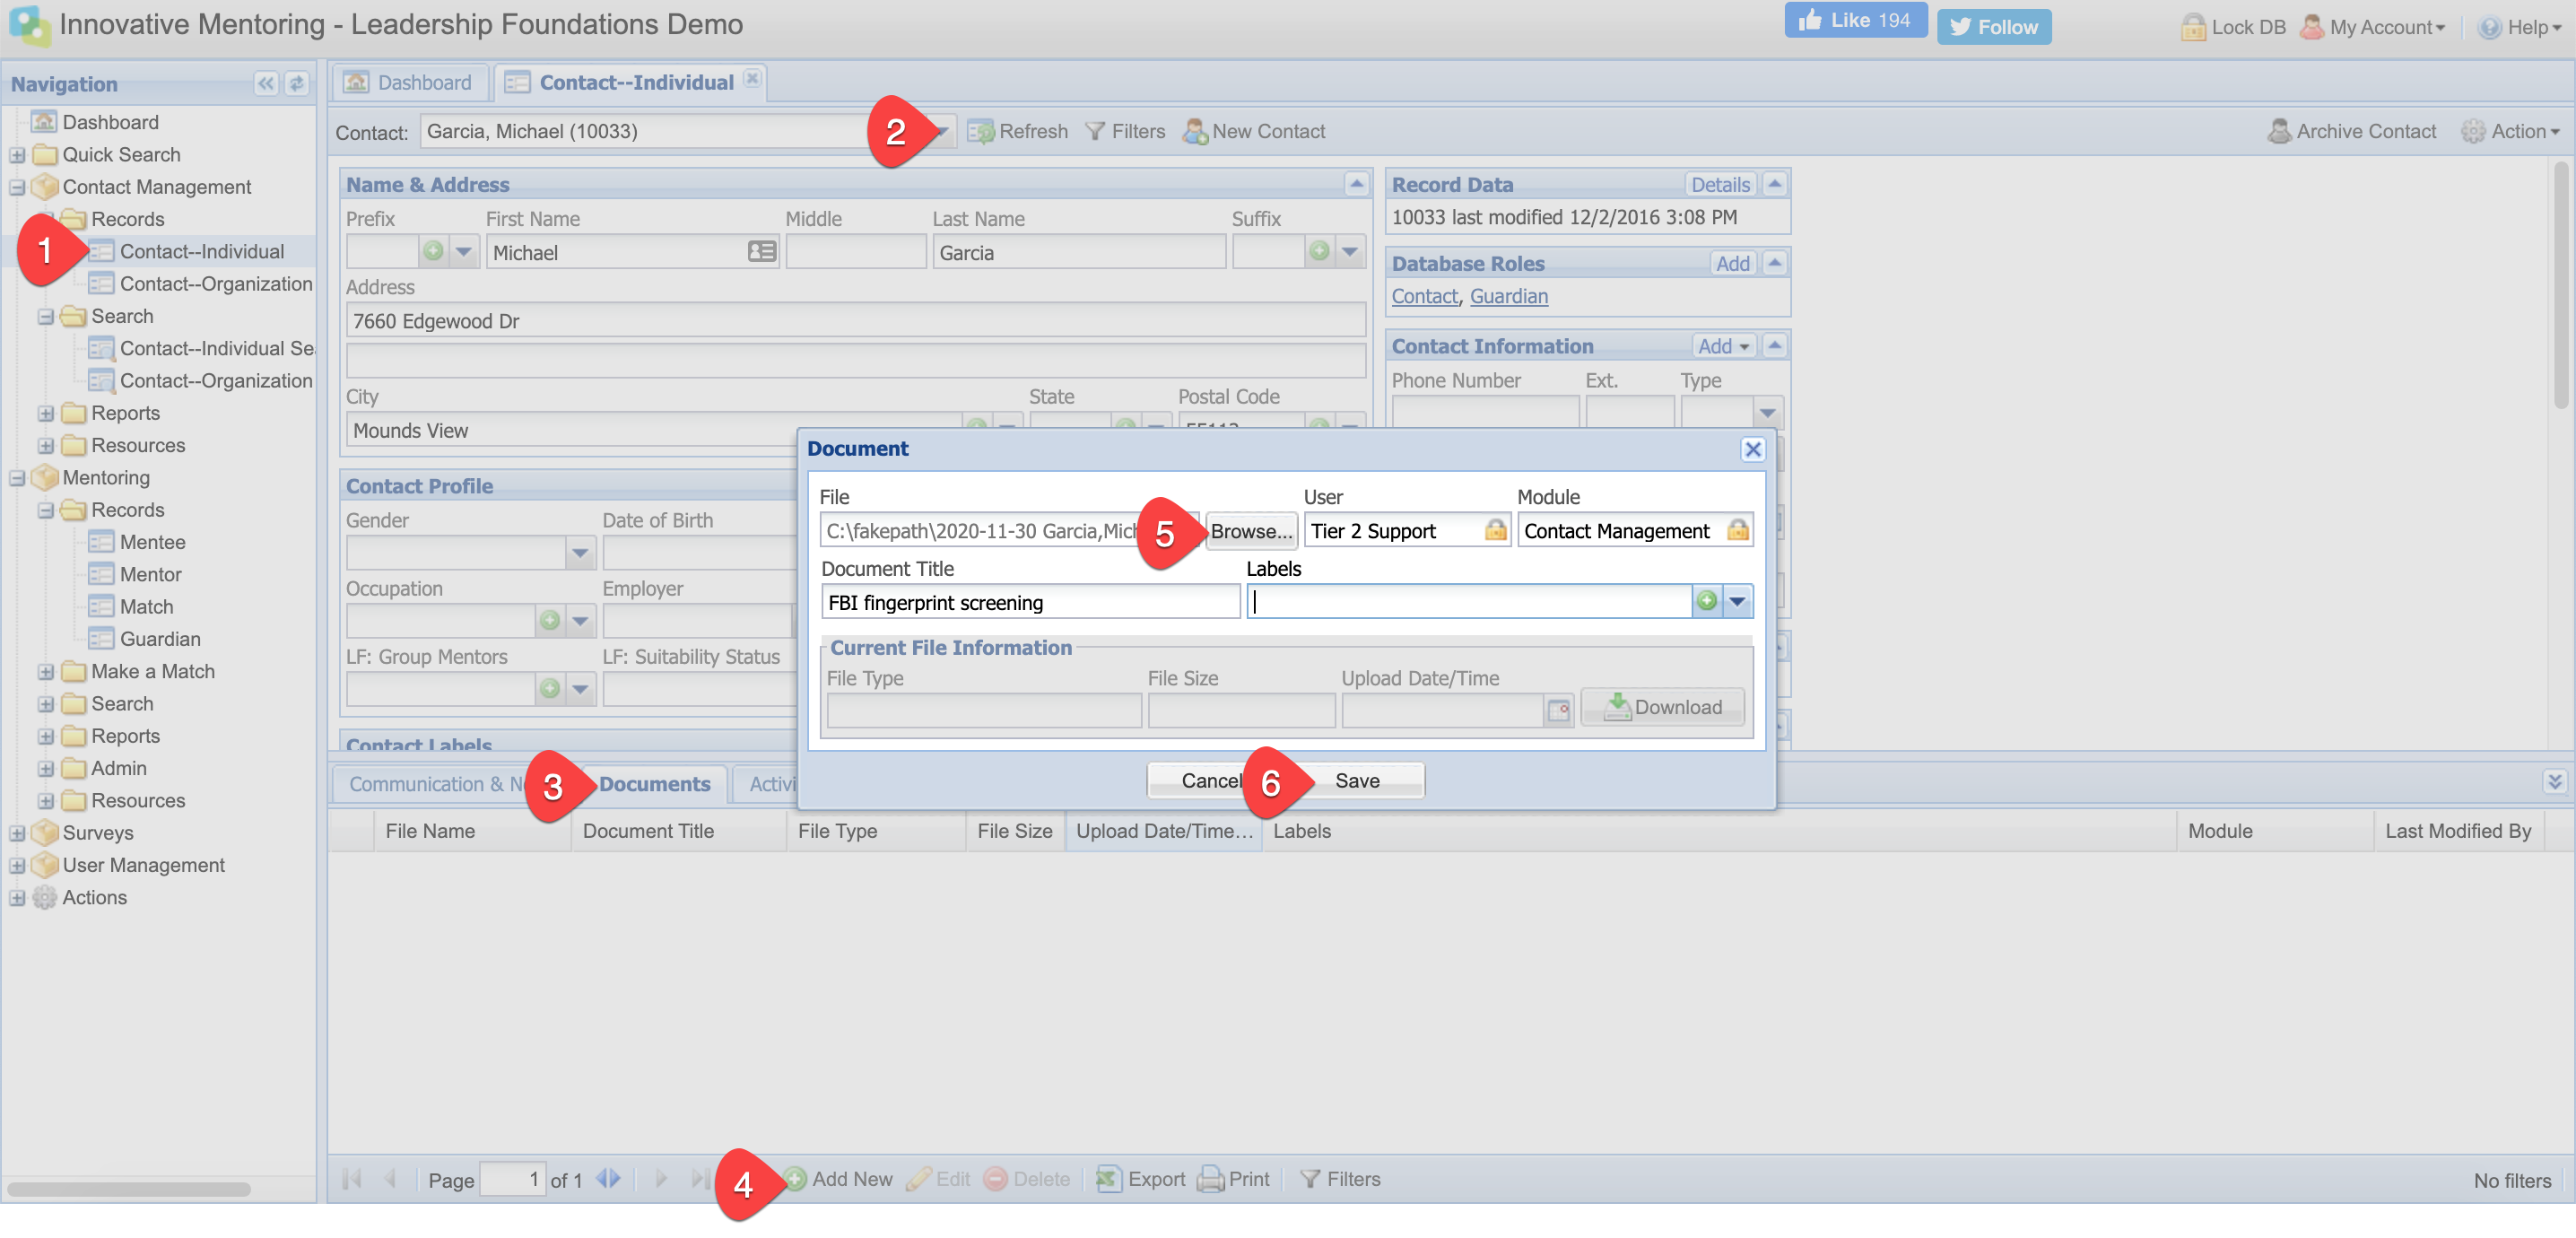
For staff and other volunteers who are not mentors but still interact with youth, you may store the required files/documentation within the Documents tab of the Contact record of each staff member/other volunteer using the following steps after scanning the file and saving it to a location that you can access from your device (eg - to a local folder (Documents) or to a network folder)::
- Navigate to the Contact folder.
- Select the staff member/other volunteer whose file you will be uploading from the Lookup (or use the New Contact button to add a new contact record).
- Select the Documents tab.
- Select the Add New footer button.
- Click the Browse button and select the desired file. Note that the Browse function will allow you to find files that are saved to your computer or network drive.
- Click Save.
Repeat steps 1-6 for each document you will be storing in IMS.
Related Article: What's the data limit on attaching documents?