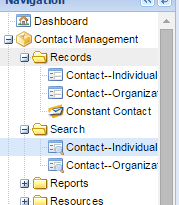
1.Go to the Contact Management module
2.Open the Search folder
3.Choose Contact-Individual
4.Select the database roles you’d like to search
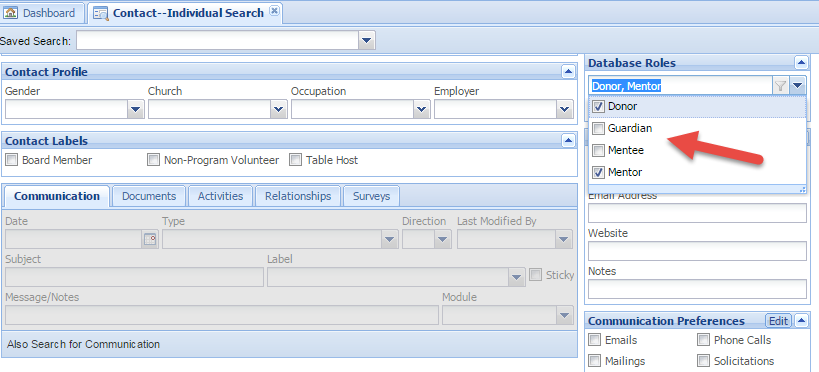
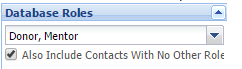
5.Be sure to check the box if you want to include general contacts (in addition to donors & mentors)
6.Run the search
![]()
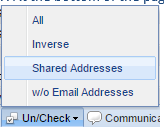
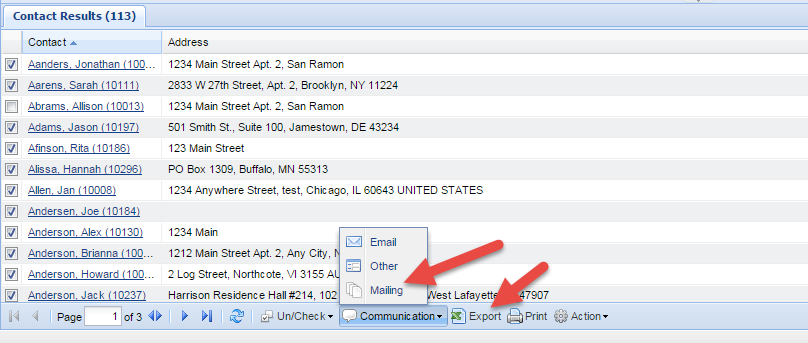
7.At the bottom of the page click Un/Check and choose Shared Addresses. (This will narrow each household down to one address.)
8.Export to Excel, (Household mailing name will appear in column AH.) or you can select Mailing to print labels. (If you are printing labels continue on with steps 9-15)
9.You will be taken to the Mailing screen. On the right hand side, you will see information regarding the search you just performed.
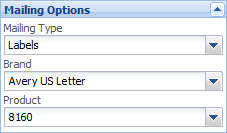
10.In the Mailing Options area, set the Mailing Type to Labels, select the appropriate label brand and product. If you don’t see the brand and/or product you would like to generate, please submit a support ticket and we will add it for you (if possible).
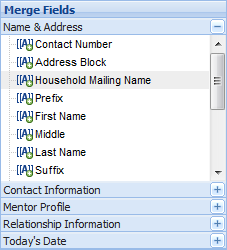
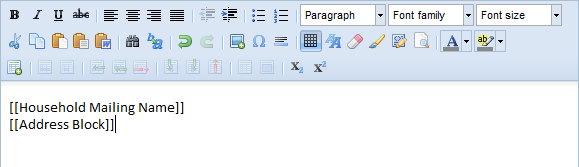
11.Insert the fields from your data that you would like printed on the label by double-clicking on them in the Merge Fields area on the right hand side—they will insert into your template wherever your cursor is.
12.Click the Run Merge button at the bottom of the screen.
![]()
13.The database will generate a single Word document with all of the labels in it—one per search result.
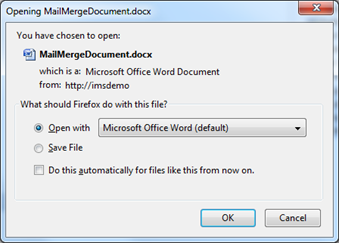
14.Select the Open with… option and click OK. The merged document will open in Word.
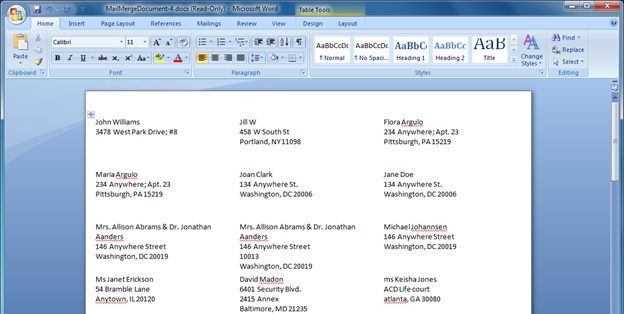
15… Review the document and make any manual adjustments you would like. Be sure to insert the correct label sheets in the printer before printing.
(Optional) You may save the label template you have just created for future use by clicking the
Save Template button
For additional information, please see our training video: Using Mailings and Labels