Adding adding additional programs to your database is easy! First, you’ll want to consider whether the program you are adding will use the same registrations steps as an existing program or if it will needs its own for one or all roles (mentor/mentee or volunteer/client).
Adding a Program that Uses the Same Registration Steps as an Existing Program.
-
Select the Mentoring or Case Management module (depending on your software package).
-
In the Admin folder, choose Program.
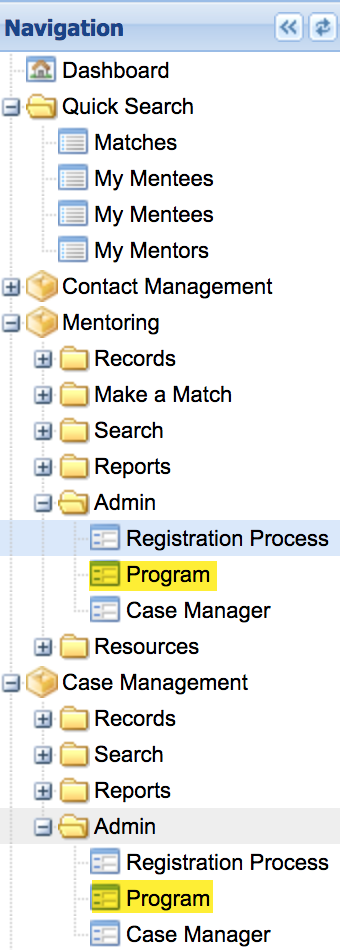
- Select New Program.

-
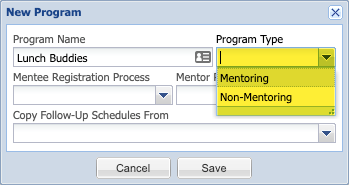
You are then prompted to enter a Program Name. Select a Program Type. This is where you specify if it is a mentoring (participants are matched one-on-one) or non-mentoring (participants are not matched or are in a group match) initiative.
-
You are then able to specify the existing Registration Process you would like to apply to this program or initiative.
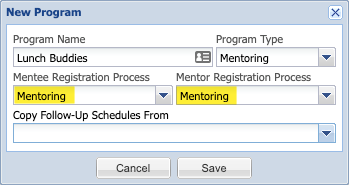
- At the Copy Follow-Up Schedules From prompt specify the program from which you would to copy the Follow-Up schedule or leave the field blank if no Follow-Ups should be generated for the new program.
Alternatively, if you would like to create a unique Follow-Up schedule for the new program, open a Help ticket to request the unique Follow-Up schedule; be sure to include the program and a detailed schedule (e.g. - weekly for the first quarter; monthly thereafter).
- Click Save
Adding a Program that will have Unique Registration Process Steps
If you are adding a new program whose registration process steps are unique, you will first need to create the Registration Process entry for the new program.
-
Select the Mentoring or Case Management module (depending on your software package)
-
In the Admin folder, choose Registration Process
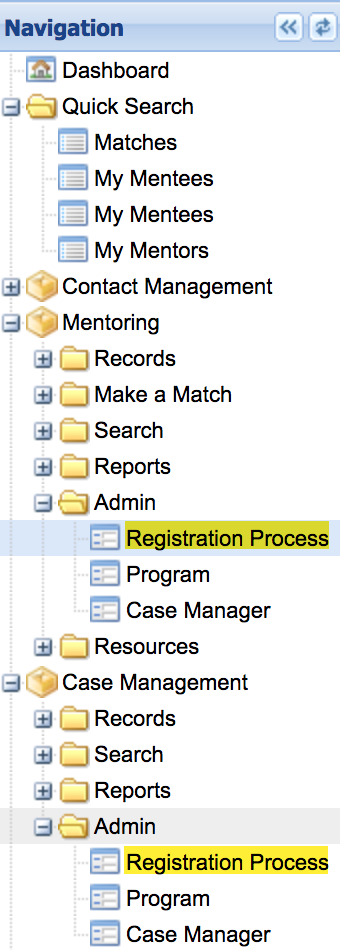
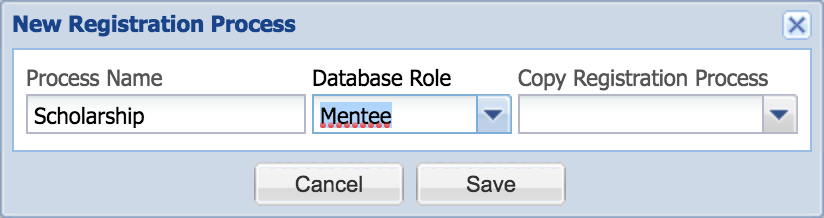
- From the Registration Process screen, click the New Registration Process button.

- Enter a descriptive name for the new registration process and assign a database role (mentor/volunteer or mentee/client). Create a unique process step for each role that requires a unique registration process. (In some cases, you may only have to create a new process step for one of the roles because the other role will will simply use an existing set of registration steps.) If the new registration process entry you are creating is similar to an existing registration process entry, you can use the Copy Registration Process option to indicate the process you want to copy in and then modify the new registration process step from there.
-
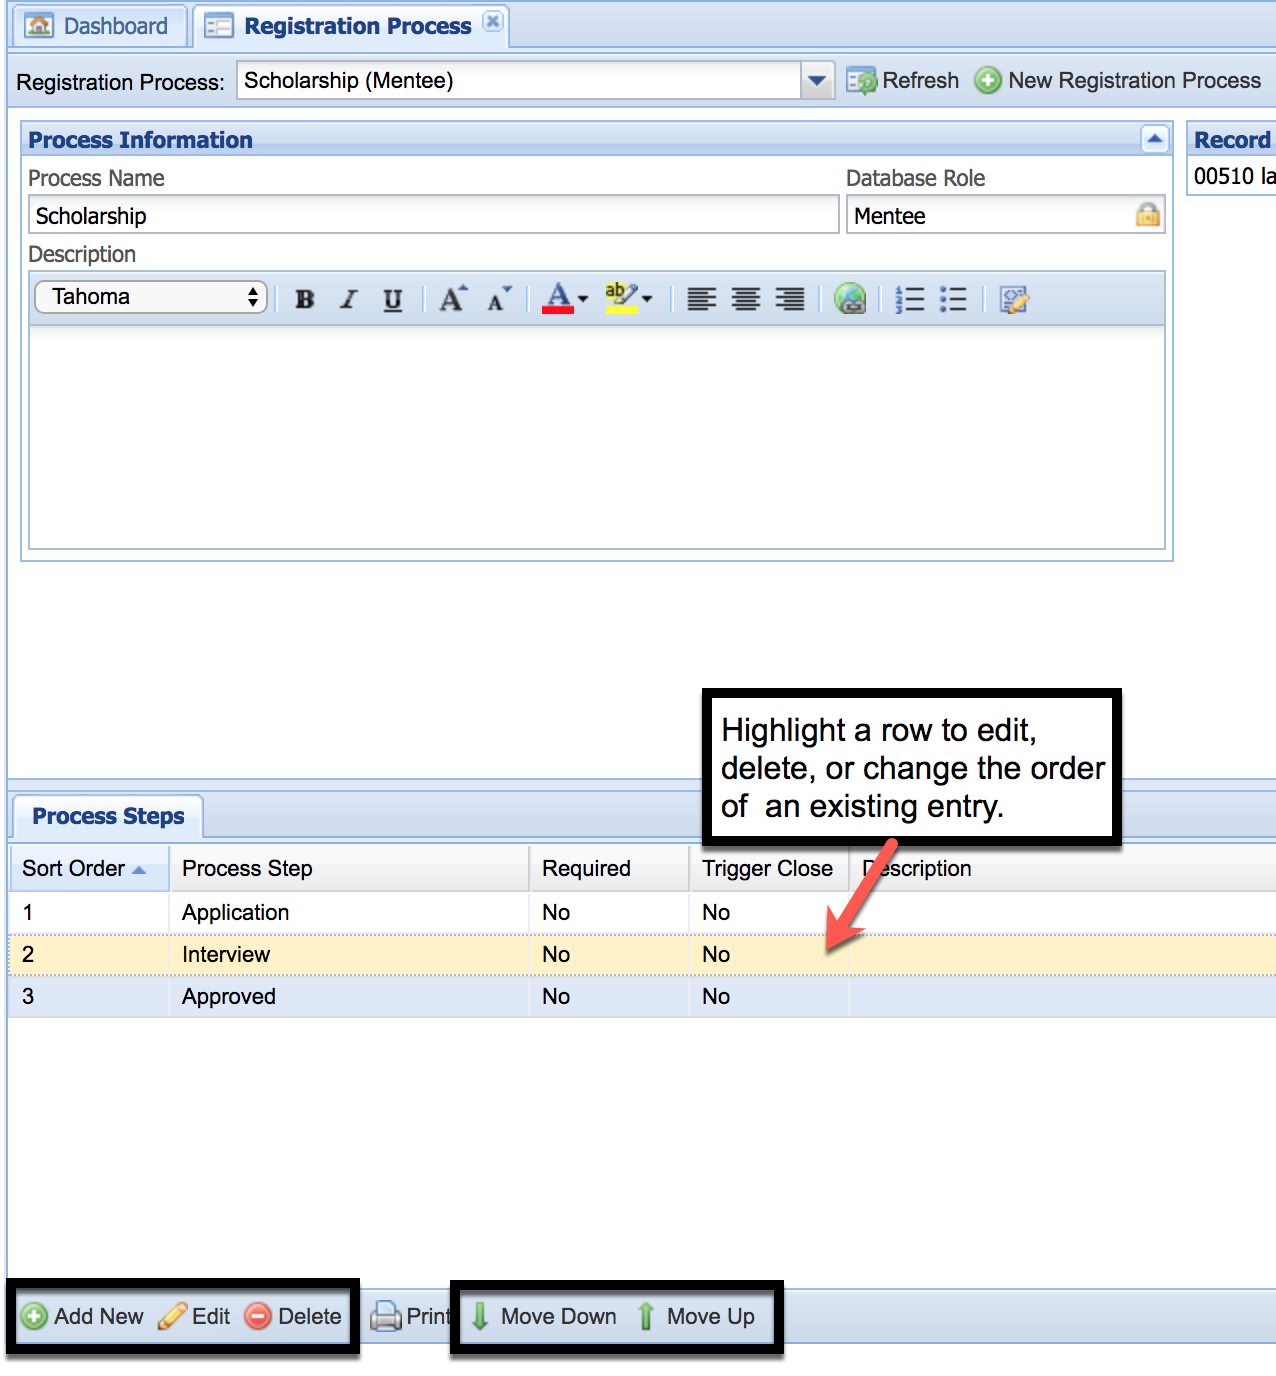
Click Save to create the new Registration Process entry.
-
From your new entry, create the new process steps or modify the steps you copied over. Use the buttons at the bottom of the screen to add new entries. If you copied existing entries, you must first highlight (click on) a registration step in order to activate the edit buttons (Edit (change the name of the registration process step name, whether the step is required, or whether the step will trigger closure of the volunteer/client record), Move Up, Move Down, Delete).
-
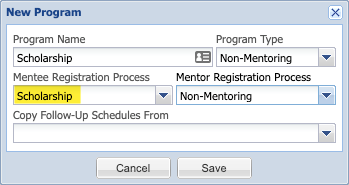
Once you have created the custom registration steps for your new program, you will create your new program.
-
In the Admin folder, choose Program.
- You are then prompted to enter a Program Name. Select a Program Type. This is where you specify if it is a mentoring (participants are matched one-on-one) or non-mentoring (participants are not matched or are in a group match) initiative.
- Specify the the registration process steps that should be applied for each roles. As noted previously, one or both of the process steps may be the new one you created in steps 1-5.
The following is an example where only one role needed a new registration process:
11.At the Copy Follow-Up Schedules From prompt specify the program from which you would to copy the Follow-Up schedule or leave the field blank if no Follow-Ups should be generated for the new program.
Alternatively, if you would like to create a unique Follow-Up schedule for the new program, open a Help ticket to request the unique Follow-Up schedule; be sure to include the program and a detailed schedule (e.g. - weekly for the first quarter; monthly thereafter).
12.Click Save.